Monday, August 31, 2009

From Scratch: Buttermilk Brownies!


This is what I had for breakfast this morning with a big glass of milk. OH MY!
Last night we had some friends stopping in that were in Michigan from Georgia.
We had a good visit, I just love it when we get to have company. We had chef''s salad and pizza and for dessert I made homemade buttermilk brownies with easy homemade frosting. I thought I'd share the recipe with you because they were SO GOOD!


BUTTERMILK BROWNIES
1 c. butter or margarine
1/3 c. cocoa
2 c. sifted all purpose flour
2 c. sugar
1 t. soda
1/2 t. salt
2 slightly beaten eggs
(I used three eggs to make a higher brownie)
1/2 c. buttermilk
(make your own by adding a few tablespoons of lemon juice to almost a half cup of milk)
1-1/2 t. vanilla

In a saucepan, combine butter, cocoa, and one cup water. Bring to boil; stir constantly. Remove from heat. In large bowl, sift together flour, sugar, soda, and salt. Stir in eggs, buttermilk, and vanilla. Add cocoa mixture; mix till blended. Pour into greased 15 x 10 x 1 inch pan. Bake at 375 for 20 minutes. Cool slightly, frost, and cut into squares.

MY FAVORITE QUICK BROWNIE FROSTING
Mix 2/3 c. sugar
3 T. milk
3 T. butter

Bring to boil; boil 30 seconds. Remove from heat; stir in 1/2 cup semi-sweet chocolate chips until melted. Mixture will be thin. Spread over warm or cooled brownies.


Ktichen Remodel: Preview

Holy Smokes, we're almost done! We started this job on the eighteenth of July. The main construction was over one week later. Then we waited a couple of weeks for the counter top. Once that was done, we thought we were home free....but we soon found out that it's the little details take the most time.

Today I wanted to show you my favorite corner of the kitchen...it's not completely done (curtains, window trim still to do) but I can show you this little section that is finished.

This was one of the issues with our kitchen remodel: little unexpected problems arose, like this microwave shelf for example. It was to go over the stove above the vent hood to hold the microwave. The opening was way, way too small for the microwave, and I don't like small ones, so I knew I'd never have a microwave to fit into the cubby....but, I thought, what a wonderful recipe book shelf it would be!

So we installed it over a base unit that stands beside the pantry so that section of the wall would not be wasted. I can see changing the display on here with the seasons and enjoying seeing all my "pretty" cookbooks (you know, the ones that can be shown! Some cannot!) lined up on display.

One of the other favorite parts about this corner is that it's where I keep my laptop. And that cute little old metal stool? It was a garage sale find for $1, and it's now covered with a spray paint with the "hammered" metal look. I love it!


On top, I put my favorite big bowl, and a "church suppers' cookbook. On top of the pantry, I put one of my favorite fruit crates, a garage sale find! In it I am storing my tablecloths. I think the cookbooks are inspirational when they're out where they can be seen...

I hope to have more pictures of the completed job to show you in a week or so, (I have to get the sewing machine out!). And if you're planning a remodel, especially in an old house, it's best to be adaptable (and always expect it to take LONGER!) because there's always surprises in store...and creative ways of making it all work sometimes have to be worked out. Sometimes your "mistakes" are your favorite parts of the whole project when it's all said and done!

Have a wonderful Monday!
XOXO
Joni

Sunday, August 30, 2009

Black & White Sundays: Pup Nap


I'm an unofficial participant in Anne Marie's BLACK & WHITE SUNDAYS.

Go here to view her blog and see her black and white choice, and which of her friends are participating.

I hope you have a good day.

XOXO
Joni

Saturday, August 29, 2009

OLD GAS: Had a BLAST!

This old beauty was marked $3,200. How I would LOVE to have it!


Mid-Michigan Old Gas Tractor Show & Pull
& Flea Market
& Chicken Dinners
& Midway
& Fun, Fun, Fun!
Oakley, MI
We went to the show and pull last Sunday morning, as is our tradition, and this year it was just he and I, a rare day out, just us, together. We enjoyed every minute of it. Back home we came to a busy week, full of surprises, some good, some not.

The morning was gray and drizzly but the closer we got to the showgrounds, the drizzle cleared off and it wasn't a bad day overall. (This weekend is just as gray and rainy!) I got to smell some tractor exhaust, and all the yummy food on the midway, it was worth it.

I wanted to post some photos to show you~I have lots of video of tractors pulling but I thought I might bore you with all that. I have to say, that I prefer the sound of a Farmall hands down over the sound of a John Deere. John Deere goes pop, pop, pop....and I prefer the fuller sound of the Farmalls. For the day, Farmalls came out on top in all the pulls we watched.

I'm off to say hello to a whole bunch of tomatoes, I think they may become another batch of salsa.

XOXO
Joni

An artist working in the sale barn, loved his work!

(Click any photo to enlarge.)

I couldn't resist showing you this pink Farmall, it seems a travesty, but then some guy could have done it for his wife who was a breast cancer survivor. (Hey, get a load of the way that guy is giving me the evil eye/death glare as I'm snapping this shot!)


Little, big, bright and shiny, or dirty and worn, they're all here. It's their weekend and they all have their chance to shine!


I just had to snap a picture of this cute little guy, he hopped up on that seat and started pretending to drive, making his tractor sound....


This big old steam engine tractor was giving rides that day. And it had a whistle like an old train engine. It was really something to see the ruts this machine left behind in the dirt! AMAZING old piece of history and it's still moving!


I like to watch the old timers and think about what might be going on in their heads as they watch all the tractors pulling. I think about the memories they've got stored from days gone by and the excitement they felt as they drove their own tractors over the years. On this day, you see a whole lot of work boots, and a whole lot of jeans and hands that have worked hard and realize that THESE are the people that built this country and that those that run this country are too far removed from the real world and that the connection with the dirt is what might be missing. I'd like to see an arrogant, pampered politician try to stand in this arena where these tractors pull and try to sell their latest load of bull to good, hard-working Americans like this.

Isn't this little grandma cute?

I thought the paint job on this one was exceptional....click on any photo to enlarge!


This fella had to back out because his machine stalled and they couldn't get it cranked again. He finally did get it back into the pulls at the very end. Don't you like his "weights"?!?


What a pretty Oliver!


This was like the tractor we had at home...lots of good memories with that riding on or behind it on an old car hood in the snow!

Waiting in line for the famous chicken dinners they serve there.


Cooked outdoors on a huge grill with a large crew of men basting and turning them, they are half-birds, deliciously charred! Mmmmm....


Now we're talkin'!


A cute little girl in a little red wagon.


While we ate, we watched the women in a log-sawing contest. They used old two-man saws and they were lots of fun to watch!


I love this old road-grader, it reminds me of the ones used to make our road when I was a little girl.

Old steel wheeled Farmall!


The steam-powered sawmill, chugging along!


I hope you enjoyed seeing all the tractors, and if you have a chance, go to one of these shows and appreciate the machine that replaced the draft horse in all its forms!

This is what I brought home; I found it in the "quilt" barn (and what's wrong with me, I should have taken pictures!!?!) and it's the perfect rag rug for my kitchen, don'tcha think?

Thursday, August 27, 2009

Connie's Sun Dills

Once upon a time, our neighbors across the road had a set of twins, a sweet boy and girl. Those little ones had the nicest babysitter you'd ever want to meet, for their infanthood and the early years after their mom had to go back to work. One summer Connie asked me when we were visiting if I'd ever made Sun Dills. I had to say I never had! I had never even heard of them. But where had they been all my life, they are THAT good! And you never did anything so easy, believe me!

I've got a lot of German in me and was raised on plenty of pickles and kraut (my dad always got the biggest kick out of giving a little one his or her first pickle, he would make a big production out of it and everyone had to watch and we'd all laugh and snap pictures at the first pucker of that little mouth when it tasted that first dill pickle! Needless to say, many of the grandkids LOVE pickles, and I mean LOVE them...some will even DRINK pickle juice when the pickles are all gone, they just tip that jar up and guzzle it!!!! Can you believe that??).

These sun dills just take the cake.

They're easy to make and if you find yourself with an unexpected bumper crop of picklers like we did from our ONE plant, get yourself a big old glass jar (any old kind, just so it's glass AND has a SCREW-ON LID!) and set some pickles out on your deck and watch them cure. All you have to do is turn them each day so they'll be evenly done, and made perfect by the sun.

Then, when they're done, refrigerate them for the crisp, cold dilly perfection that they are and ENJOY!!! These will rival ANYTHING you've got in the deli-refrigerated section anywhere!


These are all ready to set out in the sun tomorrow.

Here's the recipe:

Use clean gallon glass jars

Wash pickles, cut out the bad spots if they have any and wash thoroughly and rinse.
Then, go out to the old fencerow and pick yourself some nice big grape leaves, or call your neighbor or anyone who has 'em growin', tame or wild. You'll need these for color. Wash them and set aside.
Also, go out to the garden and cut some of that fresh dill that seeds itself year after year. Sniff deeply. Then wash and set aside. Sniff deeply again.
(See, it's fun already!)

In the very bottom of the jar, put the first layer: consisting of grape leaves, then dill heads, then 1-3 garlic toes (or more if you like your dills very garlic-y!)

Pack in the clean pickles to the halfway point on the jar, then add another layer of the grape leaves, the dill heads, and the garlic toes. Again, use as much of the dill and the garlic as you like!

Finish packing the pickles in up to the top of the jar. On the very top, you will need to lay grape leaves so they're directly under your lid. (Leave room for the brine to be poured over, then rearrange if you have to so the pickles don't touch the inside of the lid. You want the grape leaves to be on the very top.)

Then, mix 1/2 c. kosher salt
3-1/4 c. white vinegar
and about 5-6 c. water (may take less if they're really packed in there.)

Pour the salt/water/vinegar solution over all the pickles. Cover, and set in the sun. Give the jar a turn each day for one week. Then bring them in and refrigerate them. They last in the fridge for EVER, but they're so good, you won't have to worry about how long they'll last!


ENJOY your sun pickles and let me know how you do if you try them. It's a lot of fun for kids to watch the process and have them go and turn the jar and watch the pickles as they change and "cook" and turn from the bright garden green to perfect pickles!

I'll show you the "cured" jar of pickles a week from now. I wish I could give you all one to taste!

PUCKER UP FOR PICKLES!

XOXO
Joni


Wednesday, August 26, 2009

Today's The Day! Salsa!


It's a gray, rainy day. But out to the garden he went....to retrieve the fresh onions, straight out of the ground....to be washed, peeled, and chopped and I'll shed more than a few involuntary tears.

And dripping red, ripe sweet tomatoes, both the Big Girl and Roma...all getting a bath, rinsed and getting scalded, and peeled, and quartered.

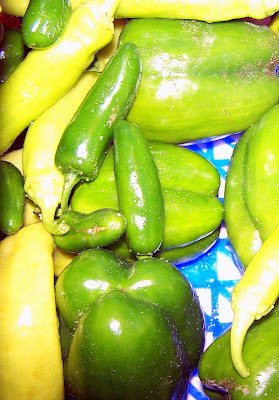
And out will come the rubber gloves and the peppers will be cut and sliced...the chopped and thrown into the mix.


My new stove will get a workout today. First those red beauties will be scalded in this pot, and then into my big canning pot will go all the wonderful ingredients to make up our yearly batch of salsa! The house is going to smell good today! Off I go in search of my favorite full apron, I'm going to need it!
XOXO
Joni