Showing posts with label Gift Ideas. Show all posts

Wednesday, January 5, 2011

Vintage + Sweet!


I have a sister who put together a gift for us to use on our trip south and to share with our daughter and son-in-law.  It was so unique and such a great idea, I thought I'd share the gift with you all, in case you ever want to give consumables away for a gift in the future (I love consumables for Christmas!).


In the brown paper craft bag with handles all tied with a pretty bow, there were all sorts of vintage and retro goodies, and some made especially for Christmas.  What a neat idea!  This way, the bag was ready to go into the car and use on our long journey...


Above is shown a vintage candy tin, made to open like a book.  Inside are the soft mints, the old-fashioned kind that melt. in. your. mouth.  ;-)


I made a little display to stand them all up and show you the goodies she carefully placed in our "to go" bag.  Vintage Cracker Jacks (got to save those boxes, they're red, white and blue!), vintage ribbon candies (so beautiful I don't want to disturb them!), a retro box of LOTS of Moon-Pies (my husband's favorite!) and more...


Remember these hard-candy discs from long ago?  In the center of each one was a Christmas tree, a candy cane, a ribbon, some looked like citrus fruit, and they were just little works of art!


See the "milk carton" shaped box?  That is snowballs...pretzels with white chocolate!  YUM!!  And in the blue package is snowman hats made of chocolate-covered marshmallows:  how cute is that?


I would love to hang those ribbon candies on my tree!  I remember these were always in the candy boxes given to us as kids on Christmas Sunday at our church, did you get those, too?  


I remember it was a ceremony of sorts, kids were called to the front and we lined up as the pastor placed our own box of hard candy into our hands.  Each box had a pop up handle made into the cardboard, and you carried them sort of like a purse.  We had to promise not to open them until we got outside or into our cars.  ;-)
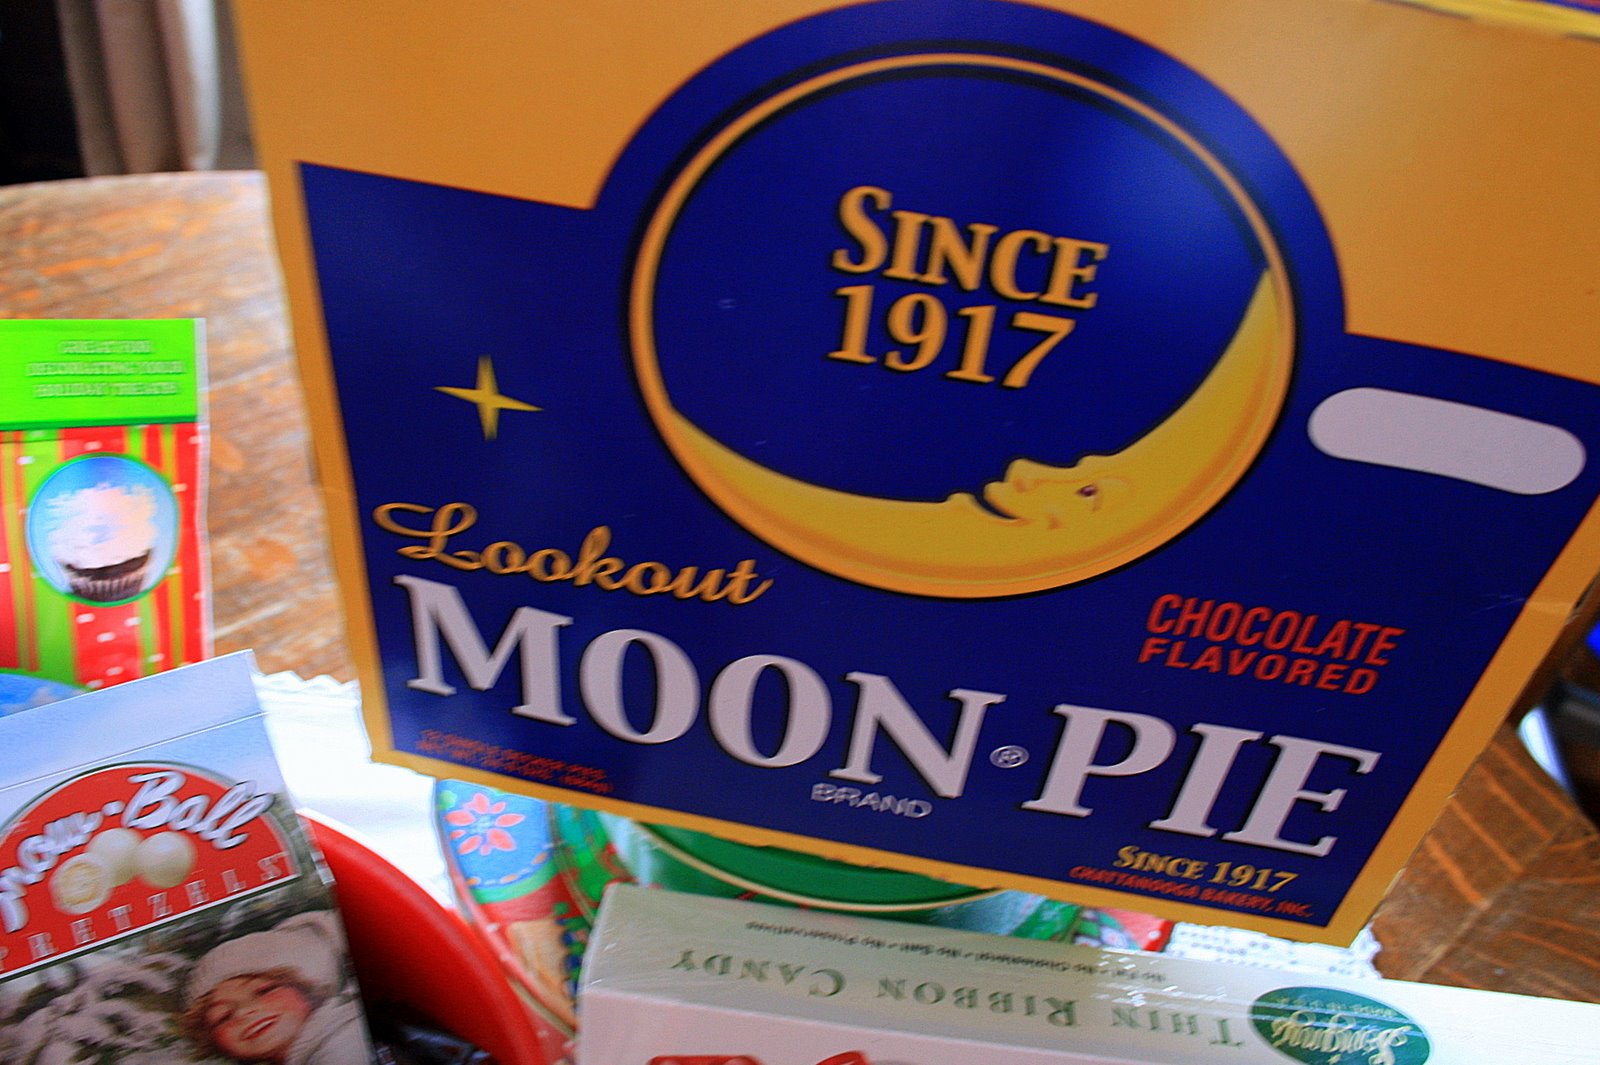


And that darling retro Moon Pie box?  I've given orders to keep it in good shape, and it's going to be glued back together and used in a display somewhere in the kitchen!


And then tucked inside, too,  were these cute as can be note cards with a vintage Campbell's Soup advertising print!


(click on any photo to enlarge)


And, look here!  This was the darling gift tag, a picture she took of a display in her own home of a vintage tableau she created with new and vintage display pieces.  The church is made to look like a vintage Putz piece, only larger with a real bell in the steeple.  It is a beautiful anchor to the display, isn't it?


I am love those Gurley candles, the choir kids have always been a favorite of mine--we always knew it was Christmas time when those came out and appeared somewhere in the living or dining room.  


It reminds me that as kids we sang in a "stocking-footed" choir at church, because the choir director hated the noise shoes made as the choir entered (or shuffled) the choir loft, so she made us remove our shoes.  The little choir kids' capes remind me of the robes we wore for the Christmas choir presentation--that's exactly what they looked like!


And that little snowman?  Who didn't see and admire one of those in their home as a kid?  I am hanging onto this gift card and will think of something to make with it, it's just too cute to throw away!


These cups with a retro Santa theme were a gift from another sister.  They now sit in the kitchen by the coffee maker...and do you know what it says in the bottom when you get to the end of your morning coffee?


And who doesn't need to hear an "atta girl" every once in a while?  ;-)


I LOVED IT and I've been drinking my coffee from one ever since I got them!


Then this sweet shadow-box type ornament was given to me by my niece, isn't it cute?  It is made from the top or base of a cardboard jewelry gift box and uses a welcoming outdoor scene from a glittery Christmas card in the center and then tucked into the corners is a small feather cardinal sitting on a nest made of wound twine (how creative is that?),  

Then in the other corner is a piece vintage plastic holly garland cute apart to use and all glittered up with a beautiful iridescent flaky glitter.  The edges are finished off with the metallic pipe cleaners.  A cute ornament for a tree, or the ribbon is long enough that it allows it to be hung from a cupboard knob or a door handle.   Beautiful!


And this tin can lid was made into a cute refrigerator magnet, with Christmas cards and metallic pipe cleaners.  Katie had another of her annual Christmas craft parties with her friends and they all made crafts like this and more.  I was so happy she gave me these, treasures all.  I am going to write her name and the year on the back.


*I always hesitate to show gifts received because I'd really like to show them all...but if they have a retro or vintage theme, I can't resist showing them to you, especially if they have value as a craft or decorating idea or a gift giving inspiration.  This is not to take away anything from other heartfelt gifts given at Christmas, I love them all!


Tuesday, December 21, 2010

Little House on the Prairie: Especially for Little Chickens...


Getting lost in "Little House on the Prairie" books was one of the best pleasures of childhood;  didn't you think so, too?

Then, when I had my own kids, it was our pleasure, to read those loved and familiar stories aloud to our kids.  But for the tiny ones, who may not be ready to sit and listen to "chapter books" as we called them, these picture books are perfect to introduce the little ones to our friends Ma, Pa, Carrie, Mary and Laura.  

These are perfectly illustrated books, in the tradition of Garth Williams....the pictures in these will take you back to the line drawings done by him when little house books were written.  


Illlustrator Rene Graef honors Garth Williams perfectly-- for her drawings are reminiscent of his style, and the colors she used are soft and gentle, just like Laura's story telling.  It's easy for your child to lose his or herself in the illustrations as you snuggle with them and read the words.


Every book in this series starts out with the same familiar sentence:

"Long ago, a little girl named Laura Ingalls lived in a little house in the Big Woods of Wisconsin with her Pa, her Ma, her sisters, Mary and Carrie, and their good old bulldog, Jack."


Then, with Laura's own words, we read about the stories of her (and  sometimes Almonzo's) life...chapters from various books shortened up for the youngest ones to listen to and maybe even read themselves when they first start learning.


My collection of these picture books numbers thirteen, and that is all that were made.  I wanted to own them all and bought them when I was homeschooling my youngest son.  I hung onto them and am now getting some for my little grandson, Levi.

They go with fond memories--I love them dearly--SUCH SWEET MEMORIES of many bed times of snuggling my own freshly bathed little blue eyed boy.  I will look forward to reading them again to another little chubby-cheeked boy with even brighter blue eyes than my own babies!

I truly do love these books and that's why I wanted to share them with my blog readers:  moms and grandmas  alike, you may not even have known Laura's books were done and you might know a certain someone who would enjoy these for a gift at Christmastime or for a special birthday.


And just for fun, here's my little grandson, Levi Jack...the one who will inherit these treasures!


The books are available on Amazon.com (here's one of them) and there are a few complete sets on eBay; this set of twelve is currently at a really good price.


Wednesday, February 17, 2010

A Very Vintage Valentine Birthday

I have a friend who has the sweetest birthday; it's Valentine's Day!


So into the mail went a sweet little package, full of vintage goodness for this friend.
My birthday wishes for her were written on the back of this sweet lil' vintage Valentine. Her and I are both lovers of food and enjoy cooking so it was the perfect card: it says

"If my COOKING you will do, my Valentine"

HA!
Since the gift was kitchen oriented, all the better!
(And the little girl wearing that big blue gingham apron is adorable, too.)


Like me, she enjoys vintage linens and has a lot of nice ones, many of which are family heirlooms. Her mom is a wonderful needle worker and has made many beautiful things for her over the years.

Into the vintage box went some goodies I'd been collecting with Pam in mind...


And since Pam's kitchen is burgundy and accented in pink and soft green, these vintage kitchen items were perfect for her!

So into the mail went my good wishes and these rosy picks, for a very vintage Valentine Birthday!


Here's a hot pad, in perfect condition....

(I like the pattern but sometimes I can't help but think this is what our brains look like....only they're not rectangular and not done up in crochet thread. I know, I'm weird.
)


And a delicate and rosy potholder...I'm sure it was saved just for company back then! It didn't look "used" at all.

Vintage finds are not only fun to hunt, they're tons of fun to GIVE!!


Here's another very vintage gift that went out ...for someone special, my niece Autumn. More kitchen goodies, a linen towel with yellow stripes and some beautifully crocheted potholders for another kitchen that is very vintage!


All tied up with a bow and a little tag with a cute sticker and wrapped in yellow tissue paper.

I can't tell you how happy it makes me to be able to give gifts like this to loved ones who love vintage as much as I do!


I get the joy of looking and finding, and then best of all, the giving.
It doesn't get much better than that!

Wednesday, August 19, 2009

iTunes & iTouch


iTunes cards make wonderful gifts. I've had an iPod or and iTouch for a while and my oldest son usually gets me an iTune card for my birthday or Christmas. I get so excited because the possibilities are endless. I recently discovered there are books that I can buy and some of them are cheaper or the same price as a paperback edition! Music is great, but being able to "read" while I mow makes me feel like I'm actually accomplishing something while I mow!

AND...since we have a router in our home, I recently found that I can read all your blogs on this iTouch via GOOGLE READER...and can do this anywhere around the house or yard, while sitting in the recliner, or while rocking on the porch or laying in bed relaxing...I can read blogs like I once read magazines! The only drawback, is that I'm not able to comment from my via Google Reader (that I know of! Am I wrong?).

I am so happy with this discovery and I know it takes me awhile, but eventually I catch up with technology!

SPEAKING OF TECHNOLOGY: Can anyone tell me why I can't watch video or hear audio with the Mozilla Firefox browser? I've downloaded the applications and still cannot do this! It's very frustrating but downloading doesn't seem to activate the audio and video applications! HELP!


I know these gift cards are in different amounts and believe me, anyone with an iTouch or and iPod will be more than happy to get one for their special day!

OH...and in case you all didn't know already, MARY ENGELBREIT has a "Home Companion" blog now! Go here to see it!


What do you use YOUR iTouch for?

Thursday, January 1, 2009

Want a Head Start on Next Year's Christmas Gifts? A Therapeutic Rice Bag Tutorial!

Ahhh.....I need you. I am so glad I have you, and that you're so hot! But hey, who's into looks!? You're just gonna make me feel better!


Okay, first you get your best stretch pants on and march your little self down to the local "Wal-Mart's" and head over to the domestics department and locate these woven place mats that come in several color families: blue, green, red. I got mine for $1.87 each. You know that Wal-Mart theme: low prices! Now get as many as you think you'll need and don't forget Aunt Fanny and the bus driver and the teacher and your preacher and your mother....you know, the whole dang list. Remove the sticky price tag label, and cut off the "Made in India/ fabric content tag, you know better than to break the law like that, but hey, you're making the world feel better with your rice bags, so what the heck? You'll also need lots of rice, they have twenty pound bags there. Pick up some thread, and don't worry about it being too matchy, you'll need to see where you're stitching, and for me, off-white worked for every color of place mat. And, if you haven't replaced your sewing machine needle, you may want to get a heavy duty one or a denim needle. This bag gets pretty thick.

Fold the place mat in half the long way. Smooth it out. Feel those ridges? Those are going to come in so handy! Well, and they just plain feel good so take a minute here and rub away....feels so right. It's already therapeutic! Once you've felt those wonderful ridges all you can stand, pin each end of the place mat at the upper corners only, as shown here. Go to the sewing machine and sew each end shut, reinforcing your seam at each end. Remember, it has heft.

Now, take out your handy-dandy hem gauge and place a pin at approximately every three inches. Only one pin is needed at the top. For those of you with OCD, go ahead and measure down to the fraction of an inch, and place the pins the whole way down if you must, but hey, we're not working on a piece of art here! It's only a rice bag that will perhaps be used as a foot warmer in a cold bed, so don't obsess over it, approximate intervals will be fine for your stitching lines.

See the fine grooves in your place mat? They were created by the fine workers in India somewhere JUST FOR US! They knew we would need these lines to stitch vertically on our rice bags! Okay, so start at the right and work your way to the left side of the bag and continue to stitch each of your little sections off by following with your needle that little groove all the way down, not forgetting to reinforce your stitching at both the top and the bottom. Thank You.

Okay, I needed to include this blurry photo so you would appreciate a cat's eye view--a cat with cataracts, that is!

If you start your stitching at the right side of your place mat, you can roll it up as you work your way to the left until you have stitched all your vertical lines. These little sections will hold your rice, which will hold the heat, which will then be applied to your achey-breaky parts. Hum along now...."Don't tell my parts, my achey breaky parts, I just don't think they'd understand! And if you tell my parts, my achey breaky parts...." Who sang that?

Now, here we have rice. Much rice! I believe I paid around $17 for this and got nine or ten rice bags from this twenty pounds. I still have more to make, so I will be heading back for more....sorry the picture is sideways, but I never said I was perfect!

Hold your rice bag up, and use a funnel with a fairly wide opening to pour approximately one cup of rice into each three-inch section. Do not fill all the way to the top, you'll need some room for give and some room for stitchin' this baby shut. I left about two thumb-widths empty at the top. Then, once each section (about one cup per section) is filled, stand your rice bag up in a 9 x 13 inch cake pan. If you overfill, the best way to remove excess rice is to take it out with a spoon. Try to get each section filled to the same level as the one next to it.

My daughter, Jamie, is an EXCELLENT rice-bag filler. She filled all the ones I made today. She also has nice photogenic and dainty hands, that are excellent for taking photos for this tutorial! Thanks, Jamie!

Just another blurry action shot! I think the cat with cataracts took this photo, too!

Now, take straight pins and pin halfway down the length of the top opening and flip it over and pin the other half on the back side. Why, you ask? Well, I will tell you. Because you have to start stitching it shut from the middle and go out to the edge. So, pinning all the way down one side won't work.

You can also pin this way too, just to help hold that rice in. It's tiny and it likes to sneak out at the most inopportune times! You do not want it sneaking out and going into the working parts of your sewing machine. It could cause problems in your machine. Or your daughter's sewing machine.....as the case may be!


Now, sew that baby shut!!!! Go slow, she's heavy! Oops, this photo is wrong! You have to start in the middle and work your way out to the end. Then flip it and do the same on the other side.

There we go! Almost done! I don't like these hand shots, they're my hands and they're homely.

Don't forget: reinforce your stitching at the beginning and the end of the seam that you make to sew the top of the bag shut!

Now, start at the bottom of one corner of your bag, and start a continuous line of reinforcement stitching....you don't want that rice getting out and making a mess! Best to reinforce our stitching. As we all know, it's best to be prepared for the worst! And that concludes our public service announcement

All done, all reinforced and such like.

Now, you may ask, "Joni, why do you put your rice bag on a plate before you warm it up?" Well, I answer, "Because you never know what yucky scum is lurking on the microwave turntable, do you?". Well, that is unless you have just cleaned said microwave. But I digress. We gotta get down to the business of putting our creation to good use!

Heat your bag from 1.5-2 minutes. Depends on your microwave wattage. Or something like that. Someone could heat it for two minutes and totally burn themselves. So be careful. Like your mama told you to. Ya Hear? Okay. So, we've measured, we've sewn, we've bagged that rice, we've reinforced and now it's time to enjoy.....


Apply that baby to your nearest and most achey body part. Or parts. Or not.

And a red one, just for variety. Winter can be dull. And that concludes my first attempt at a tutorial.
Whew! That was something. All you tutorial makers out there have my love and respect.

Please...let me know how I did, and let me know how many you make. Don't forget one for yourself!

I started today because I will need to make thirty or forty of these babies! We have large families, what can I say? And, whether they're for yourself or to give away as gifts, they are always appreciated in those achey moments when heat would feel so good on your neck, shoulder, knee, foot, eyebrows, earlobe, lips, whatever hurts, ya know?

I've made rice bags in the past and given them as gifts, but those were made of flannel and didn't have the heft and firmness that these bags have, and I, for one, appreciate heft (and firmness!) The flannel versions tended to get pretty floppy and that's nothing that Flomax could take care of, sorry to say.

These stay put and are all bendy-like and are especially helpful on those days when you got a pain in your, umm, you know, the lower part of your lower back?

My friend Shelley, smart sewing woman that she is, showed me how to make these and she gave me one for Christmas, bless her little heart, and I used it ten times in the first three days I had it. I was having a particularly achey week....Billy Cyrus (it was he who sang ACHEY BREAKY HEART) help me!

Anyway, I hope this is all clear (as mud?) for you. If you have any questions, post them in the comments section and I'll get back with you and edit my tutorial to include the information you request.


Now. Go forth. Go nuts! Buy place mats. Buy rice! Lots and lots of rice. And make rice bags. India probably needs the economic stimulus.

Approximate cost per bag: $4 (Placemat $1.87 + tax, rice approximately $2 worth per bag, about two pounds per.)

Approximate time start to finish: half an hour or less.

I always roll these up, tie with a ribbon, and attach a cute tag that says something like this:

Therapeutic Rice Bag
Keep in the freezer to use as a cold compress or...

When needed as a heating pad, heat in the microwave on a plate for one to one and a half minutes and apply to your ache or pain. Should hold heat for a half hour to forty five minutes. This bag contains rice, please do not get wet.
Made by your weird friend, Joni


And, one final note.... for all you quilters out there who know about the CHAIN sewing that makes repetitive stitching go so much faster, you can do that if you've got a pile of these to make. You'll save a lot of thread and a lot of snippin'....so go for it! I chained three to four at a time.

Just feed 'em through...

And pile 'em up....