Showing posts with label Cooking. Show all posts

Saturday, May 26, 2012

To Grill: Potato Packets aka Hobo Pies


This weekend, in addition to celebrating freedom by remembering those who have served our country, is also considered the "official start of summer"...and summer means grilling season, for many.   
A lot of us use our grills all year through and have our favorite go-to recipes, and this is one of mine.


It's versatile, and this can be made with any vegetable you have around the house that's suitable for cooking and eating--and when I do this it's called a Potato Packet because it's always a basic with potatoes as the main ingredient.  


It's also versatile for the reason that it can be a complete meal if you had some ground chuck to the packet, it cooks in with the veggies and the burger gives the flavor to the meal; and that's when it's called a Hobo Pie...


My basic recipe is with carrots, potatoes, and onion.  When I have them, we use in season goodies from the garden like zucchini and summer squash and have also used broccoli and any other number of good things that taste wonderful roasted.


Potato Packets or Hobo Pies


You will need: 


Potatoes
Carrots
Onions
Fresh zucchini or summer squash                 
Butter pats, about a Tablespoon for each packet
Foil for grill
Pam
Morton's "Nature's Seasons" or similar seasoning
*Ground chuck, if desired, for a full meal in one packet


Clean and slice your vegetables and slice them to get ready to go.  I slice the potatoes into slices an inch or less, same with carrots.  The onion is used mainly for flavoring and is best in a larger chunk.  Or, if you like, rings if you want to eat them rather than only use them for flavor.


Your foil should be just under the size of a cookie sheet because you will need room to wrap and fold over the ends and top of the packet to hold in the heat to roast your veggies, yet not have the leaking that can cause grill fires.  


Spray Pam on a sheet of foil.  Pile a single serving amount of each of the kinds of veggies, starting with the potatoes on the bottom.  On top of your little mound of goodies, place the butter and then the onion(s).  


***If you are using ground chuck, do not use the butter: instead place the ground chuck, in little chunks on the top of the stack, the steam will cook it, and the amount of fat in the ground chuck eliminates the need for the butter on your pile.


Season the whole pile with Morton's Nature's Seasoning or your own favorite.


Fold up the top, and then each end to seal the packet.


Place on the top shelf of the grill on medium heat for at least twenty minutes, perhaps more depending on the size of your packet and the thickness of your veggies.  You can test one packet with a fork, but don't poke through the bottom of the packet!


I usually place these on the grill before the meat if the meat is a twenty-minute or less job.  


 Four packets, all ready to go.  If there are leftovers, they are WONDERFUL!  


This savory seasoning is the perfect compliment to the veggies and with enough flavor infused so that the potatoes don't come out bland and tasteless.


If using butter for the flavor, your stack will look like this.  This stack is ready to seal up and cook.


This is exactly the beauty I am going for in placing my potatoes at the bottom of the stack.  


My whole family loves this entree in the summer with their grilled chicken, fish or beef.  I hope that you enjoy it, too, and feel free to leave your way of making Hobo Pies or Potato Packets and your variations used....we all love to hear other versions of what is called by the same name!


Enjoy grilling and bring on summer!  


Saturday, May 5, 2012

Farmhouse Diner: Chicken Sandwiches


I cook by the seat of my pants and I saw this recipe on Pinterest, and made it within minutes of finding it, so needless to say, I was missing a few of the ingredients.  It was Friday night and I needed something fairly simple and good for dinner that night.  I had thawed some chicken breasts, and was browsing Pinterest to find something new.  


But hey, this recipe was so good with my substitutions that I may just keep on making it "wrong"!  


I didn't photograph each step of the recipe, it's fairly simple and straightforward, I recommend a Ziploc bag rather than their recommendation of two pieces of Saran Wrap, because when I pound something with a mallet, it tends to send icky stuff flying everywhere, so I saved myself the mess and used the bag.  It worked great.


The way this turned out, my boys wouldn't mind if this was my stand-by "fried chicken" instead of my old recipe.  I tend to agree!


Why the difference?  


I honestly think it's the powdered sugar in the recipe, it gives the coating a dryness needed to be on the sandwich, and it's just PERFECT.  Who would've thought?  I substituted cornmeal for whole wheat flour and that was great, too.  I may try it next time with the whole wheat just to make sure that cornmeal is my favorite way.


Imitation "Chick-Fil-A" Sandwiches!


2 chicken breasts
Peanut oil for frying
(I didn't have peanut oil, so used corn oil instead in my cast iron dutch oven which seems to work best for fried chicken!)
Kosher salt
Pepper
1 t. paprika
1 egg
1/2 c. milk
3/4 cup flour
1/4 c. whole wheat flour
(I assumed the whole wheat was for crunch, and didn't have any, so I substituted cornmeal.)
1 T. dry milk
2 T. water
1 T. powdered sugar
1/4 t. baking soda
1/4 t. dry mustard
(I substituted soul food seasoning and Morton's "HOT" salt for all the seasonings, except for the Kosher salt and the pepper and just loved it.)


Cut breasts into four pieces, slicing horizontally.  Place the chicken in a gallon Ziploc and pound them into submission, excuse me, I mean flat pieces without breaking them.


Salt and pepper them.
Mix egg, water, milk, in a bowl.
Mix flours, dry milk, powdered sugar, soda and dry mustard in another.


Dip the chicken in the milk, then in the egg wash.


Fry in hot oil.  Drain on paper towels.  Serve with a slice dill pickle on a toasted bun.  YUM!!

**I doubled this recipe, the leftovers would be great again in a sandwich, OR, sliced into a Cobb Salad!**


This was dinner, just the sandwich, with my sun dills sliced into planks on top of the chicken, no condiments, nothing else.  It was awesome!  


Have you ever heard of powdered sugar in fried chicken before?


Thursday, April 26, 2012

Cool Ice Cube Trick


How to get a sunny-side-up egg or a hard-cooked one 
without trying to turn it.

Just cook the egg to white, and then to set the yolk, 
throw in an ice cube.


Then...


Throw on a lid.


Cook until it's to your liking.

The steam from the ice cube does your work for you!


(**Do not use this method in a cast iron pan, it may crack!  Water will do the same trick.**)


Today my preference was halfway between...


It's ready to go!


Eggs!  Nature's most perfect food!


In the words of Doctor Seuss...


Would you like them
here or there?


Would you like them
anywhere?


How do you like YOUR eggs?


Wednesday, December 7, 2011

Simple Suppers: Unstuffed Cabbage!


Who doesn't need time-savers at Christmastime?


One pan dinners are the best this time of year, for their warmth, their filling satisfaction, and for the ease of preparation and cleanup!


We've got better things to do like string lights and decorate the house, wrap gifts, and make sugar cookies, right?


So....cold outside.  Warm yourself up!


My husband loves this.  My boys?  Not so much, just because they don't care for cabbage.  I have to admit that when I was young, cabbage cooking always smelled like old people to me.  I guess we are officially old now.  Heh.  I guess a time or two a year won't hurt to be old.


**Please note:  Although the recipe says to assemble it all and bake it in the oven for almost an hour, instead to speed it up, I mix mine on the stove and cook it most of the way and then add the cheese and only bake until the cheese is browned.


UNSTUFFED CABBAGE


6 c. chopped cabbage  
1/2 lb. ground beef (or venison)
1 small onion
1 c. uncooked instant rice
1/2 t. salt
1/4 t. pepper
2 can tomato soup, undiluted
1 c. water
1/3 c. shredded cheddar cheese


**Instead of canned tomato soup, I use my home-canned tomatoes and leave out the water or just add a little.


Place the cabbage in a greased 2.5 quart baking dish.  In a skillet cook beef and onion over medium heat until meat is no longer pink, drain.  Stir in the rice, salt if desired, and spoon over cabbage.  Combine soup and water, pour over  beef mixture.


Cover and bake at 350 for 40-50 minutes until rice and cabbage and tender.  Uncover, sprinkle with cheese, bake and 5-10 minutes longer or until cheese is melted.


Easy, peasy!  Serve with a salad or a nice bread and enjoy the taste of cabbage rolls without taking all the time to roll them!


Leftovers are awesome to send the next day for lunch, it actually improves the flavors!


Hope all is well with you and your Christmas preparations!


(And don't tell anyone I'm old, okay?!)


Monday, September 19, 2011

Is It Monday Again? It's Not Pretty, BUT...It's Pork Spare Ribs!


It's jean jacket season again!  Have you got your brooch(es) ready?
(I posted this picture because it's something pretty to look at 
because any post about  cooking meat is just darn UGLY.)


Good MONDAY morning to ya!  I hope you all had a nice weekend.  I did, and that means it was a normal, relaxing weekend.  You see, my husband doesn't have every Saturday off, he works every other.

So on the Saturday/Sunday he's home, it's a celebration of being NORMAL.  I love it.  For most of our marriage, he has worked Saturdays, and believe me, sleeping in together on a Saturday morning is not taken for granted by me--it feels special and wonderful.

We attended the football game at my son's school on Friday night to kick things off, that's always fun--and the bonus was they won; the downside the score was in the high sixties to ZERO, so not a lot of excitement.  Luke went to an "Overtime" youth group activity afterwards that lasted until midnight.  We stayed up so we could go pick him up.  Of course, we got to bed really late.

We slept in on Saturday morning, I love that feeling of knowing when you go to bed on Friday night that you don't need to get up and rush away for anything in the morning.  We shocked ourselves by sleeping until 11:30!  I can't even tell you the last time that happened, but the cooler fall weather probably had that effect, it just feels so good to sleep!  :0)

Saturday, with what we had left of the day, we worked around here getting normal chores done, taking the pool down, and a few extra things around the house and yard, the dogs played outside, and I hung laundry out in the sunshine and crispy wind and made a good dinner.  


In this interest of full disclosure, this photo taken with my iPhone.


I got venison steaks out to marinate for Sunday dinner and after church we came home to grill them on a smoky mesquite on our old-fashioned Weber charcoal grill.  YUM!  Then the rest of Sunday was spent relaxing and I actually got to watch a movie Sunday night.  

The weather for the whole weekend was soft, golden and absolutely beautiful for early fall,  the air wasn't too cold, but the nights were crisp and the corn all around us is starting to dry out and turn brown.  It's almost time to pick the pumpkins and decorate for fall!  

Now onto the "not pretty" part of this post...

Pork ribs.  The elusive tender but delicious ribs had stymied me for years, I tried everything.  A par boil.  A slow boil.  A slow boil in coke.  A slow boil in anything at all, the crock pot, the pressure cooker, all the way from start to finish on the grill...everything I tried ended with frustrating results--and a less than pleasing rib...maybe it was just me.

Until the last few years.  I finally decided just to bake those suckers slow in the oven.  It works to tenderize almost every other cut of meat that goes in tough.  


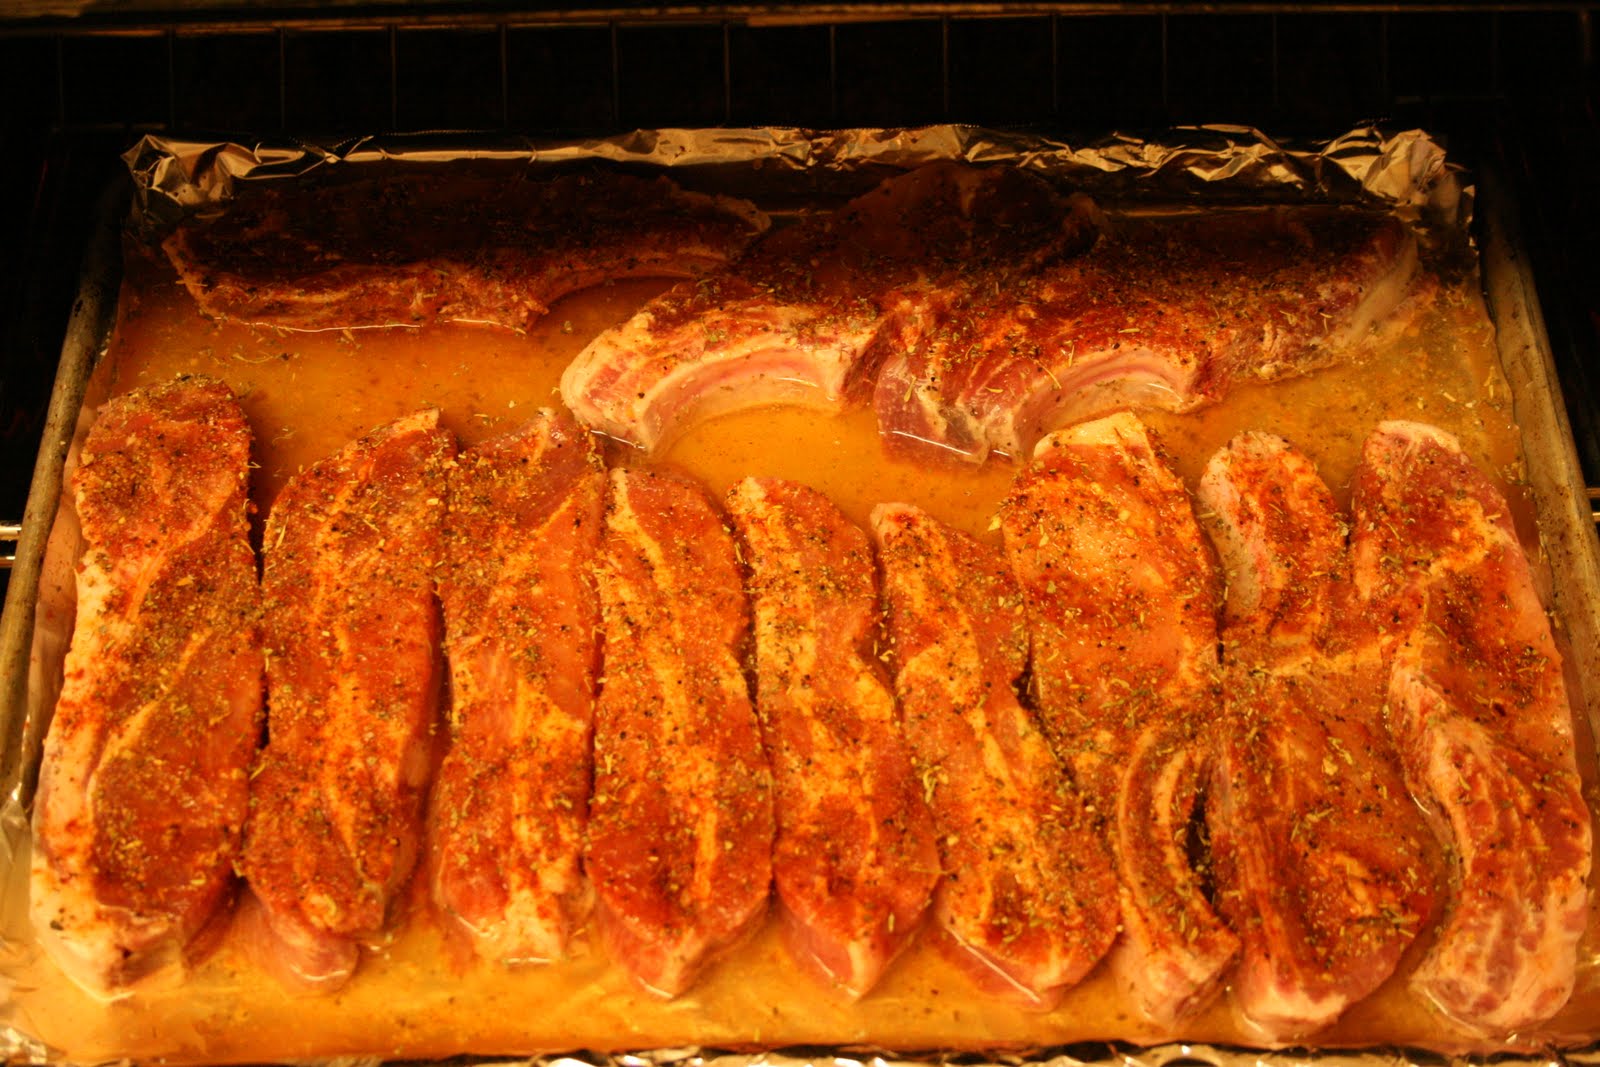
Since it will be a long, slow bake, put foil onto a jelly roll pan.  Spray with PAM.  


Take your country ribs and smear them with seasonings, anything you like--a BBQ rub would be fine.  Pepper, Kosher salt, seasoned salt, garlic salt, onion salt, and whatever else you normally like to smear on, and rub that stuff right into the ribs with your fingers.


Be generous with the seasonings.  Pour it ON.  If a little is good, more is better.


It ain't no time to get skimpy.  
("Skimpy" is another funny word that my mom says all the time--meaning stingy.)


Put water into the pan to come at least halfway up the ribs or so.  You might want to do this after you've already set your pan into the oven rack, so you don't spill.  Do NOT cover.


 In the morning, this is how these came out.  I had to get up a time or two in the night to make sure of the liquid not drying out.


Now, since these are usually for a holiday, I like to bake them all night so they'll be ready for lunch on the holiday.  If you were to have these for dinner, you could bake from early morning until supper time and you'd be good, but let's just say these babies need to bake slowly, uncovered in a 250 degree oven for at least four hours but for me six is the minimum.


You do want the tops of the ribs to be a bit dry and crusty on top for a finish.  You want them to be really done, perhaps even to be a little bit blackened, on the corners on top... the only thing you might need to do is check to make sure the liquid hasn't dried up a couple of times during the baking time.


Now remove these beauties from the pan with a stiff pancake turner...so they don't fall off the bone.  Get rid of all the yucky stuff with the foil to the garbage and drain the ribs on paper toweling.


Then apply the barbecue sauce to the top surface and grill them for a short time to get the sauce to stick to them-- on your gas grill or your hot charcoal grill and maybe even smoke them a bit with wet mesquite or any other kind of wood chips.


The finished product:  lick your fingers and smack your lips goodness, and tender yet not dry, perfectly ready to serve with the rest of your meal, and nothing to be ashamed of.  I think you'll be quite pleased with this method, with the result of fall-off-the-bone goodness.


Have you got a favorite way to make great ribs?  I would love to hear your method.


(I LOVE Blue Jean Jacket season...otherwise known as FALL.)


Friday, September 9, 2011

This is NOT a Pretty Post!


Posts about meat are ugly.


I've never yet seen a nice photo of uncooked meat that took my breath away.  (Have you? :-)


SO, I stuck some more palatable pictures into the post for today, to make it bearable.


Every time I go to Jamie's house, I try to leave her freezer a little bit fuller than I found it.  I look for meat that is on sale and buy some to freeze to make life a little easier for them after I'm gone.


I lucked out last visit.  Great pork tenderloins were on sale for $2.59 a pound, a full $1.30 less per pound than the same thing at home.  I bought a nice big one.  FRUGAL.  


This one weighed almost nine pounds (like my first baby!) and at 2.59 per pound was $22.35.  


I knew there would be several good meals out of it.  In fact, we had one right away.  What was left was 3/4 of this bad boy.  


I got out the cutting board and the knife and within just a few minutes was all done with a good number of packages of meat for meals for them waiting in the freezer.


If you wanted a nice roast from this cut, you could cut one off, and freeze it for later.   This section above is just about the right size for a small family.  (We didn't save a roast this time.)


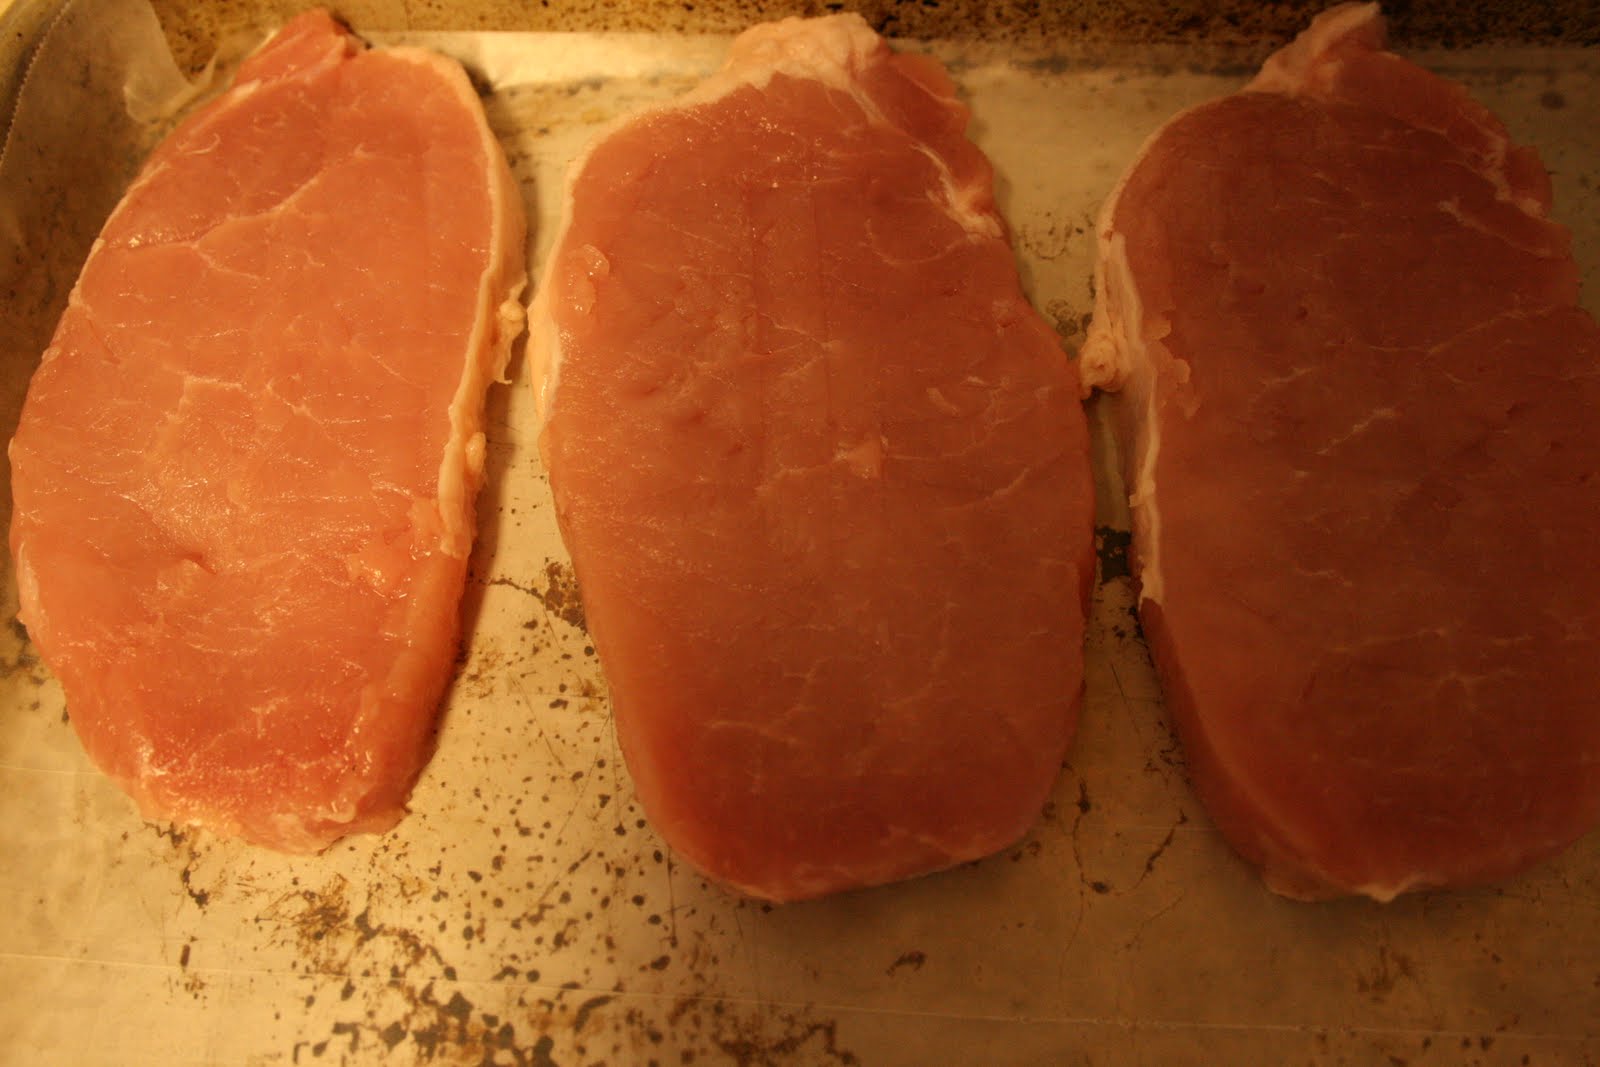
Next, I got out jelly roll pans and lined them with waxed paper.  Then cut off consistent sized boneless chops.  YUM.  (If you choose to pan-fry, do so with half olive oil and half butter for best results.)


I lined them up without them touching each other...(be good now, and don't slide!)


Topped each pan with waxed paper, and ...


Set them in a level spot in the freezer, the pans stacked on top of each other because the waxed paper on top of them wouldn't allow them to stick to each other.


I let them stay in there long enough to freeze solid, then removed them and took the waxed paper away, and bagged them up in gallon Ziploc freezer bags.


This will allow her to get as many out individually as she needs for a meal.  Convenient.


Labeled them and all done!  The loin was $22.35 and I estimated eight meals in all from that one purchase.  That comes down to $2.79 PER MEAL--not per helping!  I was wishing I'd bought more than one of them when I figured the result!


***This method of freezing portions individually is what I use to freeze chicken when I find it's on sale, and burgers after I form them into patties, and for almost anything that's more convenient to pull from a bag in the right number of portions instead of having it all frozen together in a lump.


Now, wasn't that easy?


And aren't vintage trucks in these colors much more attractive than cold pork?!

Wednesday, August 3, 2011

Hog Wild about "Wings"!


One night we got a hankerin' for Buffalo Wild Wings, but didn't want to spend the money.  I think they are way overpriced.  I mean wings are mostly bones!  But that's just me.  


I found a way to make wild wings without having a buffalo!  Or wings!  Hahaha!!


Sift:
2 c. flour
1 t. salt
1-1/2 t. black pepper
1 t. garlic powder
1/2 t. paprika
1/2 t. cayenne


Whisk:
2 eggs
1 c. milk


Whisk the eggs and the milk.  
Cut boneless skinless chicken breasts into wing-sized chunks.  
Dip the pieces into the egg mixture and then the flour mixture.  Deep fry pieces in hot oil at least six minutes and then remove and drain on paper towel.


For dipping purposes:


HOT SAUCE:  
(IF you can HANDLE it!!)  
1/2 c. hot sauce
1 T. margarine, melted


HONEY BBQ
2. c. ketchup
1/2 c. honey
1/4 Worcestershire sauce


Bleu Cheese dressing from your grocery store


(Also, if you want the true wild wings experience, cut up some celery into sticks.  Then turn up three televisions to different sports events...and make it annoyingly loud!  Bahaha!)


Which came first?  The chicken or the wings?!


Use plastic containers with lids to put six or so "wings" to coat at a time while the wings are still hot.  Put the sauce into the containers, add a few "wings" at a time, and shake, repeating until all have been coated.  


These can be popped into a hot oven 375 or so just for a few minutes to bind the sauces to them.  I put mine on foil that had been sprayed with Pam, so they wouldn't stick.


The ultimate compliment came from my boys when they said these were "almost as good as Buffalo Wild Wings!"   


I just about fell off my chair.  No buffalo-ing!


Success!