Showing posts with label FRUGAL COOKING. Show all posts

Thursday, June 7, 2012

Farmhouse Diner: Perfect French Toast


Girlfriends, I found the very BEST French toast recipe and I just have to share it with you.  


This is a restaurant-quality recipe and of course, we enjoy having breakfast for supper about once a week at least.  With fresh strawberries right from the patch, this is seasonal food that is so wonderful to enjoy this time of year.  Nothing beats a strawberry right from the garden!


Served with a slice or two of good butcher-shop bacon, it's oooh...so sweet with garden-fresh strawberries and some confectioner's sugar.   


I can't wait to try this again, with some new variations...for one, I am going to trade out the white sugar for brown, and I also want to add nutmeg to it. 


This is a custard-like dip for your french toast with a nice substance and a good finish and feel.  The difference in this recipe that is something I never had done before is the flour in the recipe.  It coats the bread in a substantial way and prevents sogginess.  


See what you think!  


Farmhouse French Toast
1/4 cup all purpose flour
1 cup milk
1 pinch salt
1/2 t. cinnamon
3 eggs
1 t. vanilla extract
1 T. white sugar
12 slices of thick bread


1.  Measure flour into a large bowl or I put it into the mixer bowl on the Kitchen-aid; it worked really well for me...  


2.  Whisk into the flour the milk, then eggs, then salt, cinnamon, vanilla extract and sugar; and mix or whisk until smooth. 


3.  Lightly oil a griddle or frypan over medium heat.


4.  Dip each bread slice on each side to soak; and the cook on a griddle until golden brown.


SERVE your way!  ENJOY! 


Strawberries!  I love them, and I love anything with strawberries on it!  
And I also love gingham--it's in my kitchen.
They go together so well.

This time of year, I pull out a single napkin my daughter Jamie gave to me, with a single strawberry embroidered on it, and I place it over the valance in my kitchen window over the sink.  Simple and fun.  I can do this throughout the year with different themes if they match my red gingham!  


And here is a red gingham strawberry I place in different spots around the kitchen, right now, it's a "topper" to a vintage milk bottle with adorable red graphics.  More RED here.  


Do you enjoy a breakfast for dinner every now and then?  


Wednesday, December 7, 2011

Simple Suppers: Unstuffed Cabbage!


Who doesn't need time-savers at Christmastime?


One pan dinners are the best this time of year, for their warmth, their filling satisfaction, and for the ease of preparation and cleanup!


We've got better things to do like string lights and decorate the house, wrap gifts, and make sugar cookies, right?


So....cold outside.  Warm yourself up!


My husband loves this.  My boys?  Not so much, just because they don't care for cabbage.  I have to admit that when I was young, cabbage cooking always smelled like old people to me.  I guess we are officially old now.  Heh.  I guess a time or two a year won't hurt to be old.


**Please note:  Although the recipe says to assemble it all and bake it in the oven for almost an hour, instead to speed it up, I mix mine on the stove and cook it most of the way and then add the cheese and only bake until the cheese is browned.


UNSTUFFED CABBAGE


6 c. chopped cabbage  
1/2 lb. ground beef (or venison)
1 small onion
1 c. uncooked instant rice
1/2 t. salt
1/4 t. pepper
2 can tomato soup, undiluted
1 c. water
1/3 c. shredded cheddar cheese


**Instead of canned tomato soup, I use my home-canned tomatoes and leave out the water or just add a little.


Place the cabbage in a greased 2.5 quart baking dish.  In a skillet cook beef and onion over medium heat until meat is no longer pink, drain.  Stir in the rice, salt if desired, and spoon over cabbage.  Combine soup and water, pour over  beef mixture.


Cover and bake at 350 for 40-50 minutes until rice and cabbage and tender.  Uncover, sprinkle with cheese, bake and 5-10 minutes longer or until cheese is melted.


Easy, peasy!  Serve with a salad or a nice bread and enjoy the taste of cabbage rolls without taking all the time to roll them!


Leftovers are awesome to send the next day for lunch, it actually improves the flavors!


Hope all is well with you and your Christmas preparations!


(And don't tell anyone I'm old, okay?!)


Friday, September 9, 2011

This is NOT a Pretty Post!


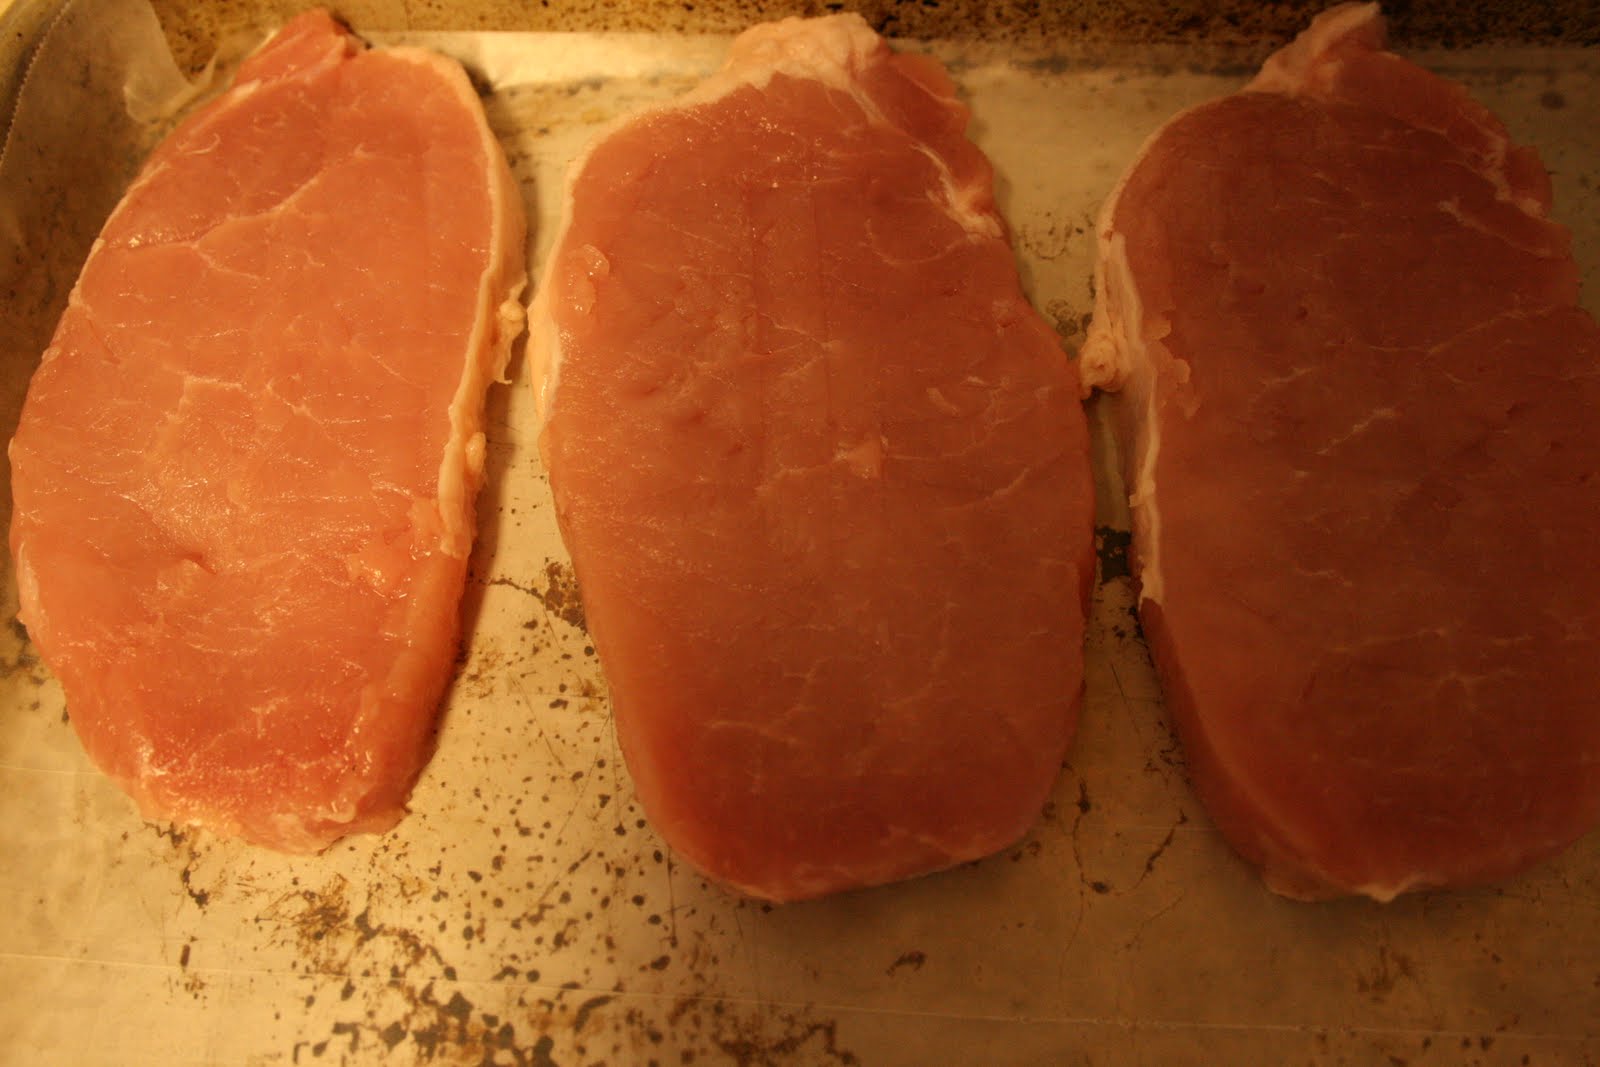
Posts about meat are ugly.


I've never yet seen a nice photo of uncooked meat that took my breath away.  (Have you? :-)


SO, I stuck some more palatable pictures into the post for today, to make it bearable.


Every time I go to Jamie's house, I try to leave her freezer a little bit fuller than I found it.  I look for meat that is on sale and buy some to freeze to make life a little easier for them after I'm gone.


I lucked out last visit.  Great pork tenderloins were on sale for $2.59 a pound, a full $1.30 less per pound than the same thing at home.  I bought a nice big one.  FRUGAL.  


This one weighed almost nine pounds (like my first baby!) and at 2.59 per pound was $22.35.  


I knew there would be several good meals out of it.  In fact, we had one right away.  What was left was 3/4 of this bad boy.  


I got out the cutting board and the knife and within just a few minutes was all done with a good number of packages of meat for meals for them waiting in the freezer.


If you wanted a nice roast from this cut, you could cut one off, and freeze it for later.   This section above is just about the right size for a small family.  (We didn't save a roast this time.)


Next, I got out jelly roll pans and lined them with waxed paper.  Then cut off consistent sized boneless chops.  YUM.  (If you choose to pan-fry, do so with half olive oil and half butter for best results.)


I lined them up without them touching each other...(be good now, and don't slide!)


Topped each pan with waxed paper, and ...


Set them in a level spot in the freezer, the pans stacked on top of each other because the waxed paper on top of them wouldn't allow them to stick to each other.


I let them stay in there long enough to freeze solid, then removed them and took the waxed paper away, and bagged them up in gallon Ziploc freezer bags.


This will allow her to get as many out individually as she needs for a meal.  Convenient.


Labeled them and all done!  The loin was $22.35 and I estimated eight meals in all from that one purchase.  That comes down to $2.79 PER MEAL--not per helping!  I was wishing I'd bought more than one of them when I figured the result!


***This method of freezing portions individually is what I use to freeze chicken when I find it's on sale, and burgers after I form them into patties, and for almost anything that's more convenient to pull from a bag in the right number of portions instead of having it all frozen together in a lump.


Now, wasn't that easy?


And aren't vintage trucks in these colors much more attractive than cold pork?!

Wednesday, October 27, 2010

Season's Gleanings! (& A Recipe!)


Weekend before last, I was out in the garden, and I picked a peck of peppers...


And, I got busy with my daughter and grandon's visit, and promptly forgot about them.


And then today dawned blustery, stormy, cloudy.  And it dawned on me then that it was a perfectly perfect pepper soup day.

Stuffed pepper soup, to be exact, especially since I was passing those peppers each time I left the house and came back in...they were really starting to bug me!

But there were plenty!  I could make a batch of soup and MORE could be chopped and kept for the freezer. They can be used in the soup this winter!  So, measured out in two cup batches, I can pull a bag out and pop them in the soup pot.


The soup is done, and I buttered a piece of brown bread and ate a bowl that was steaming hot for lunch.

YUM!


And after lunch, I got busy and chopped those peppers for the freezer with my trusty little friend, the "Vidalia CHOP WIZARD".

This one is from Bed, Bath and Beyond, and I paid around $20 and used my coupon, but you can get a knock-off brand from Wal-Mart for right around $10.

It has been a huge help to me in my chopping for canning and freezing from the garden.  It's an invaluable tool on those long salsa-making days in late summer.  There is a small and a large chop, I use the larger one the most.  All your peppers and onions and everything for the soup (or salsa or whatever) come out perfectly uniform.  (And cleanup is easy!) 


And....would you like the recipe for "STUFFED PEPPER SOUP"?

It's so full of vegetables and all good things, and I used my canned tomatoes, but if you don't have those, don't worry.


Here you go...

Stuffed Pepper Soup
1 c. chopped onions
1/4 c. chopped celery (or more if you'd like)
1 clove garlic, minced
2 c. chopped green bell pepper 
(I used my reds, too)
2 T. Vegetable oil
1/2 lb. browned lean ground beef or ground venison (even better!)
One sixteen ounce can crushed tomatoes
1/2 c. tomato juice
1/4 c. uncooked long grain rice
3 c. water
2 T. chopped fresh parsley
2 t. sugar
1 t. salt
1 t. black pepper
1\4 t. ground cinnamon (optional)


Saute vegetables in oil just until tender, do not brown them -- just cook until tender.  Just under about ten minutes.  

Then stir in rice, tomatoes, juice, water, parsley, sugar, salt, and pepper and browned meat.  

Cover and simmer approximately 45 minutes and adjust liquid if necessary, until rice is fully cooked.


It's a great sense of accomplishment when you can put away items from your garden to use in the wintertime...on blustery snowy days.


ENJOY!!


(And I'll try not to let those red and green peppers remind me that Christmas is only two months away!)


(Oh, and I'm using BLOGGER'S new editor, and I am having a terrible time getting my font to be the right size.  It's either THIS  or THIS.  Which do you prefer?  The small one is called normal, I call it microscopic.  The large one is GIGANTIC, in my opinion.  What say YOU?)

Monday, February 22, 2010

Simple & Easy: Baked Steak Fries


Thanks to my friend, Linda, I've found that there's an easy and painless way to make your own restaurant-quality steak fries at home without frying them!

These go very well with grilled steak, burgers or chicken, even fish. They are simple to make and are done faster than you might think!

You will need:

Baking potatoes, washed and drained or dried off (1.5 potatoes per serving)

Olive oil
(several tablespoons to 1/4 cup depending on how many potatoes)

Lowery's seasoned salt OR your favorite seasoning
(I enjoy a Cajun blend spice along with a very light sprinkling of the seasoned salt.)

a gallon-sized Ziploc bag

Preheat oven to 450


On a cutting board, slice the baking potatoes the long way, and slice them again, then again into pieces as shown above. I usually get at least eight good sized fries from one regular baking potato.

Place the potato slices into a Ziploc bag, then add enough olive oil to coat lightly but don't drown them. Work the potatoes around in the closed bag until they've all had a light coating of the olive oil. It will depend on how many potatoes you use, just hazard a guess on the olive oil.

Once the potatoes have been coated, put them in a hot oven (450) on a large cookie sheet or jelly roll pan that has been sprayed with PAM and put them in the center top of the oven.

Bake for as long as necessary (anywhere from 15-30 minutes or so) to get the desired crispness; the first time you do these, you'll need to be keeping an eye on them .

You can flip each one individually half way through baking if you want them all done evenly on both sides. Or not. I usually let mine go longer because my guys prefer them to be dark or well done and very crisp.

Once they are done, shut oven down and remove the fries, season them lightly while still hot on the cookie sheet.

Remove the fries to a platter that has been lined with paper towel.

Break out the ketchup and serve!

This is a healthy side dish and not too heavy on the calories!

YUM!

Garden note:
We are JUST NOW running out of the potatoes we grew in our own gardens last summer! We are going to plant potatoes every year from now on and add even more rows this spring. We may be able to get two harvests of potatoes if we can stagger the plantings, we're excited to see how it works out. We loved having our own home-grown potatoes all winter!


This is one of a batch we had of super-duper sized potatoes...It's pictured next to the big sized soup can and WOW!


This is our potato harvest when they were fresh out of the ground and ready to wait a week to wash. Potatoes prefer to grow in cool weather and last summer was very cool so that might explain why we had such a good harvest.

Do you grow your own potatoes?

They're actually a lot of fun to grow, except for the part that requires one to mound dirt up around the plant. GOOD GRIEF! We ran out of dirt! The more dirt, though, the better the potatoes turn out, as the dirt denies the sunlight a chance to turn the skin of the potatoes a green color which is a mildly toxic substance called solanine.

If you plan to grow a garden this year and are looking for a good all-around gardening book this one is it:
Go to this link to see a copy and read the reviews:

READER'S DIGEST
1001 HINTS & TIPS
FOR YOUR GARDEN


It's arranged A-Z. Want to know how to grow your own potatoes?
Go to P for potatoes. Simple! Is your lawn giving you fits? L for lawn!

This book is chock full of easy to read information and just enough illustrations and diagrams to not be dry and boring. I find it to be a great gift for a gardener, first time or not! I am constantly referring to this book.

I buy mine that I give to my friends used off AMAZON.COM and usually get it for under $2 plus shipping. Right now there's a copy for 39 cents plus shipping! Amazing!

I've given many away because interest in gardening is way up and no wonder! Saving money on food is a smart move, and if you've got the room for growing your own food, it's a relaxing and rewarding way to feed your family! Growing and preserving food for your family is a double blessing.


I have a copy sitting on my table right now that I ordered for my friend Shelley, who is going to plant a basic kitchen vegetable garden this spring. I can't wait to give it to her as I find great pleasure in helping others learn to do what our parents and their parents did: make your ground work for you and earn its keep!

And, here are some more gardening/canning/preserving photos for you to enjoy, I know I had fun finding them in my photo files, it makes me anxious for spring!


Dreaming of spring and of gardening!

Friday, February 5, 2010

Easy Berry Cobbler


I made a terrible supper last night for my family. It was memorably bad.
If I were to describe it to you, I'm sure you would have a stomach ache just from hearing about it.

Ever have one of THOSE nights?

I had one last week and one again this week.

Tonight I tried to make it up to them and made baked beef stew, homemade rolls and this cobbler. It's warm and yummy to the tummy.

This recipe comes from my sweet, southern friend Pam, who loves food as much as I do. I will always be glad that she shared the recipe with me...she's always been generous that way.

Any recipe from a southern friend is well worth having!

Easy Berry Cobbler

or
Triple Berry Cobbler

2/3 c. each flour AND sugar
1 - 1/2 tsp. baking powder
2/3 c. milk
2-3 c. berries
6 T. margarine
(I use my frozen strawberries and raspberries from the garden and blueberries.)

Combine flour, sugar, baking powder, and milk in a bowl.
Melt margarine in baking dish.
Pour batter over melted margarine.
Spoon berries over top.
Bake at 400 degrees for 30 minutes.
Batter will rise to the top.


Have a warm and cozy weekend. I have some sewing to do while my foot mends...a big breakfast for all of us on Saturday morning, the BUD SHOOTOUT in Daytona on Saturday night for us ...then church on Sunday followed I hope by something good for dinner and all ready to head into another busy week!

Keep Warm and thanks for stopping by!
XOXO
Joni

Thursday, January 7, 2010

So......What's YOUR Comfort Food?


Home.

Homemade.

Two beautiful words.


It's cold and snowing...finally.


We had cold before, but hardly any snow.


That kind of weather is just...blah!
Gray, dull, weary, tired.


But snow?
Bring it on, it makes the winter ground beautiful pure white and sparkly again and adorns trees, rooftops, porch railings.

That makes for bakin' and cookin' the good stuff mood around here.


Pull out the recipe box kind of weather...


It's make the house smell good time.


It's also time to open those jars of goodies that were canned this summer and fall!


Time to do some mixin' and risin'....


Comfort foods are a matter of the heart. You really LOVE your comfort foods.


Doesn't matter if you're a guy or a girl, everyone has a comfort food that brings back memories...


Comfort. Love. Contentment.

And all sorts of cozy feelings...right?


We don't count calories when we eat our comfort foods....if you do, it takes all the fun and loveliness out of eating it, making you into a regular killjoy!


So....simple, and yet SO GOOD.


And simply beautiful, too.

Homey.


So....

What
is
YOUR
favorite
comfort
food?


Recipes here...

Mine? Make it soups and stews.

You?